We all like a sweet treat every now and again…and again and again in my case – just don’t tell my trainer!
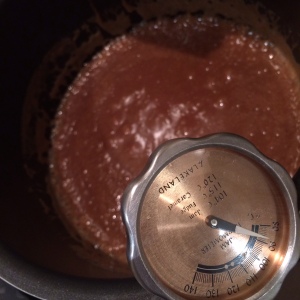
I stumbled across this fudge recipe when looking up recipes that I could use as Christmas presents this year. It was the first time I’ve made fudge properly and, with a pinch of beginners luck (and a trusty sugar thermometer), it turned out perfectly and received top marks from all my colleagues at work, friends, house guests and people on the street upon whom I could force it. I’ve even had to share the recipe before I had chance to write this blog, so I know it’s popular!
The recipe (including 1kg of sugar and vast amounts of butter and cream) makes about 100 squares of fudge, so try to share with at least one or two friends if you can, no matter how moreish you find it – your waistline will agree with me!
Preparation time: 2 minutes – to weigh out the ingredients and lightly grease a tin
Cooking time: 40 minutes (approximately 20 minutes for each type of fudge) + cooling time (at least 4 hours in the fridge)
Ingredients:
For the chocolate fudge:
- 300ml double cream
- 500g golden caster sugar
- 2 tbsp liquid glucose (Dr Oetker brand usually sold in larger supermarkets)
- 150g butter, diced
- 150g milk/dark chocolate
For the vanilla fudge:
- 300ml double cream
- 500g light brown muscovado sugar
- 2 tbsp liquid glucose (Dr Oetker brand usually sold in larger supermarkets)
- 150g butter, diced
- 1 tsp vanilla extract
Recipe:
- Weigh out your ingredients and lightly grease a large baking dish (approx. 20cm by 30cm) with oil.
- For the chocolate fudge, pour all the relevant ingredients into a large pan over a low-medium heat (it needs to be a large pan as the contents will bubble up). Stir gently until all the sugar has dissolved, then turn the heat up, insert your sugar thermometer and leave to boil and bubble away until the mixture reaches 120°C.
- When the mixture’s temperature hits this magic number, pour into a heat-proof bowl (being careful – it will be very hot to touch) and leave to cool for a moment. Then, with an electric whisk on a high-speed beat the mixture for a couple of minutes until it thickens slightly.
- Pour out into the greased baking dish, and using a trusty spatula smooth into all the corners until reasonable even.
- The cooking of the vanilla fudge is exactly the same: all the ingredients in the pan at once, low-medium heat until sugar dissolved, the high heat until 120°C.
- Pour the vanilla fudge mixture into a heat proof bowl, leave to cool for a moment again and whisk as before.
- Pour the vanilla fudge over the previous layer of chocolate fudge in the baking dish, which should have started to set by now. Try to get an even layer as possible. Then set aside and leave to cool for 1-2 hours outside the fridge, then cover and leave to set in the fridge for as long as you can resist.
- When you’re ready to eat, do not reach for a spoon – I know it’s tempting. Instead take a large knife and cut into thumb nail sized squares and store in an airtight container…if it lasts that long.


